Showing posts with label Tutorial. Show all posts

Monday, September 16, 2013

Robot Mittens

I try to make a lot of the gifts I give out for Christmas and birthdays, it's usually budget friendly and I feel like it's a little better than giving a gift card. Now don't get me wrong, I love getting money for a gift, who doesn't? But I also enjoy gifts that are unique and have had some time put into them.  .

Last year I waited until a month or two before Christmas to start making our gifts and almost didn't finish making everything, I figured it would be smart to start a little early this year. It's no fun when your stressing out a week before Christmas because you have so much to get done. The holidays are more enjoyable when they are stress free, don't ya think?

While looking for things to make Charlie I came across this wonderful mitten pattern and I crochet him some mittens. The pattern is well written and I was able to get the gloves done really quick. The pattern can also be used to make gloves for older kids and adults too. After looking at the mittens I felt like they could use a little more protection. I don't know if you've ever played in the snow with crochet gloves but after a few minutes the snow starts to seep through the gloves and your hands get cold really quick. If there is snow outside it is inevitable that Charlie will be in it. So I needed to come up with a way to keep the snow from getting through right away.


I found some felt in my craft room and came up with a robot that I could sew onto the gloves. It will give Charlie's hands a little more protection from the cold and it looks cute to boot! I made a printable robot pattern and a simple oval pattern that you could put on the gloves instead of the robot if your looking for something quick.

The materials I used where
-Yarn
-Crochet needle
-Scissors
-Needle
-Thread
-Crafting felt sheets in any color you choose
-Craft glue (optional)

Step one! Crochet your gloves. 

Step two! Cut out your Robot!

Step three! Sew the eyes to the Robots head and the hands
 to the robots arms.

Step four! Place both heads on each of the gloves
 and make sure their placement is the same. You need
to also make sure that you are putting the Robot
on to the palm of each glove. Sew them on.

Step five! Do the same thing with the body of the
 robot and sew that puppy onto your mitten.

      Step six! Sew on your arms and your done!

Notes- I used a stitch similar to a blanket stitch for this project. You want to be very careful to not go through both layers of the glove when trying to sew your applique on. 
You can use a craft glue to stick the eyes and hands in place before you start stitching but it isn't necessary.
If you would like to use a different fabric like cotton for your mittens you may want to add fusible interfacing to it so that it isn't so flimsy. It will also keep the fabric from fraying.  Double sided fusible interfacing like Heat and Bond, will not stick well to your mitten and you run the risk of melting your yarn if you try to iron it on. So if you go the interfacing route then iron it on to your fabric only and iron it before you place the pieces on your glove so you don't burn anything.


I hope you really enjoyed this tutorial. Its really simple and lots of fun, you don't even have to use a robot. Make your own applique and put it together and post a picture on the Divine Crafting Facebook Page, I would love to see what you've come up with.

Sunday, April 7, 2013

Making a Baby Dress out of an Old Shirt


        When I was a kid I remember my Mom sewing me clothes because it was just so expensive to buy clothes for all five of us kids. Its funny how things have changed. I can go to the store and buy my daughter a dress for ten dollars or I can go to Hobby Lobby and spend eight dollars on a yard of fabric, two dollars on a zipper, one dollar on a dress pattern (if its not on sale I would spent 4-10 bucks) and then go home and spend a few hours making the dress. Sometimes it just isn't practical to sew when you can buy it already made. But If you get creative you can make things for relatively cheap. Look around your house and reuse things that you would normally just give to good will. Re-purposing things sometimes forces me to be a little more creative. Even though making things sometimes ends up being a little pricey and time consuming, I really enjoy it. In some ways, sewing has become my therapy. When I have had an absolutely horrible day where nothing has gone the way I planned. When I've spent all day trying to keep Alice from climbing on everything or when I have to scrub Charlies artwork off of the walls, crafting is my escape from the stress.


This week I was looking through a pile of old clothes that I keep with the intent that I may use them in a project some day, and I found a shirt that my Husband refuses to wear because he HATES to wear anything with a collar. At his last job they had a strict dress code and we bough him a bunch of polo shirts out of necessity. If he had a choice he would have gone to work every day in flip flops a t-shirt and shorts. Now that he has a choice as to what he can wear to work, he wears a t-shirt everyday. And I have a plethora of polo and button up shirts that he refuses to wear (even though he looks amazing in them). I couldn't just throw away all of these shirts (I am a pack rat) so I have saved them until I found something that I really wanted to make.

I figured I would make Alice a dress and here is how I did it. 
I used my seam ripper and took apart most of the shirt, the collar, sleeves and the short band at the bottom of the sleeves were all taken apart. I saved all of the pieces because I had no idea what I was was going to need. 
Once most of the shirt was deconstructed I took the main part of the shirt cut it in half just below the buttons.


 Then I laid a dress that currently fits Alice, on the top part of the shirt and use it as an outline to measure out how big I needed to make the new dress. Then I folded the shirt in half  so that I could cut the arm holes and the sides of the dress to the size I though should work. Since I didn't have a pattern I left the shit pretty big and put it on Alice to see how much I needed to adjust the arm holes. It was really nice to  be able to test the size of the dress on her as I made it. After a little adjusting I sewed both sides of the shirt until I got to the arm holes. Then I put the shirt back on her and I realized that the neck of the dress was just too big, so I took it in a little. The way I fixed the neck required me to adjust the arm hole location again. 

Here is what the arms look like up close
Since the old collar was just too big, I took one of the arm bands and sewed it around the neck opening as a new collar. Next, I took the remaining armband and cut it in half and used each of them on the arm area to give the sleeves a finished look.  I then took the bottom half of the shirt that I cut off earlier and gathered the fabric and attached it to the top of the shirt. I didn't need to worry about hemming up the bottom of the skirt because I kept the original hem.

This was the 3rd time I tried the top on her
to see how it was fitting. After the 5th try on she
started to get really mad and run away when ever
I came near her with the dress.
I pinned the arm band around the neck as the
new collar.


The dress is still a little too long for her, she trips over it when she climbs the stairs. I will have to shorten it a few inches. I am also working on some flowers to add to the dress so that it doesn't look so bland but I haven't had time to finish them. 

Thanks for reading!


Wednesday, February 15, 2012

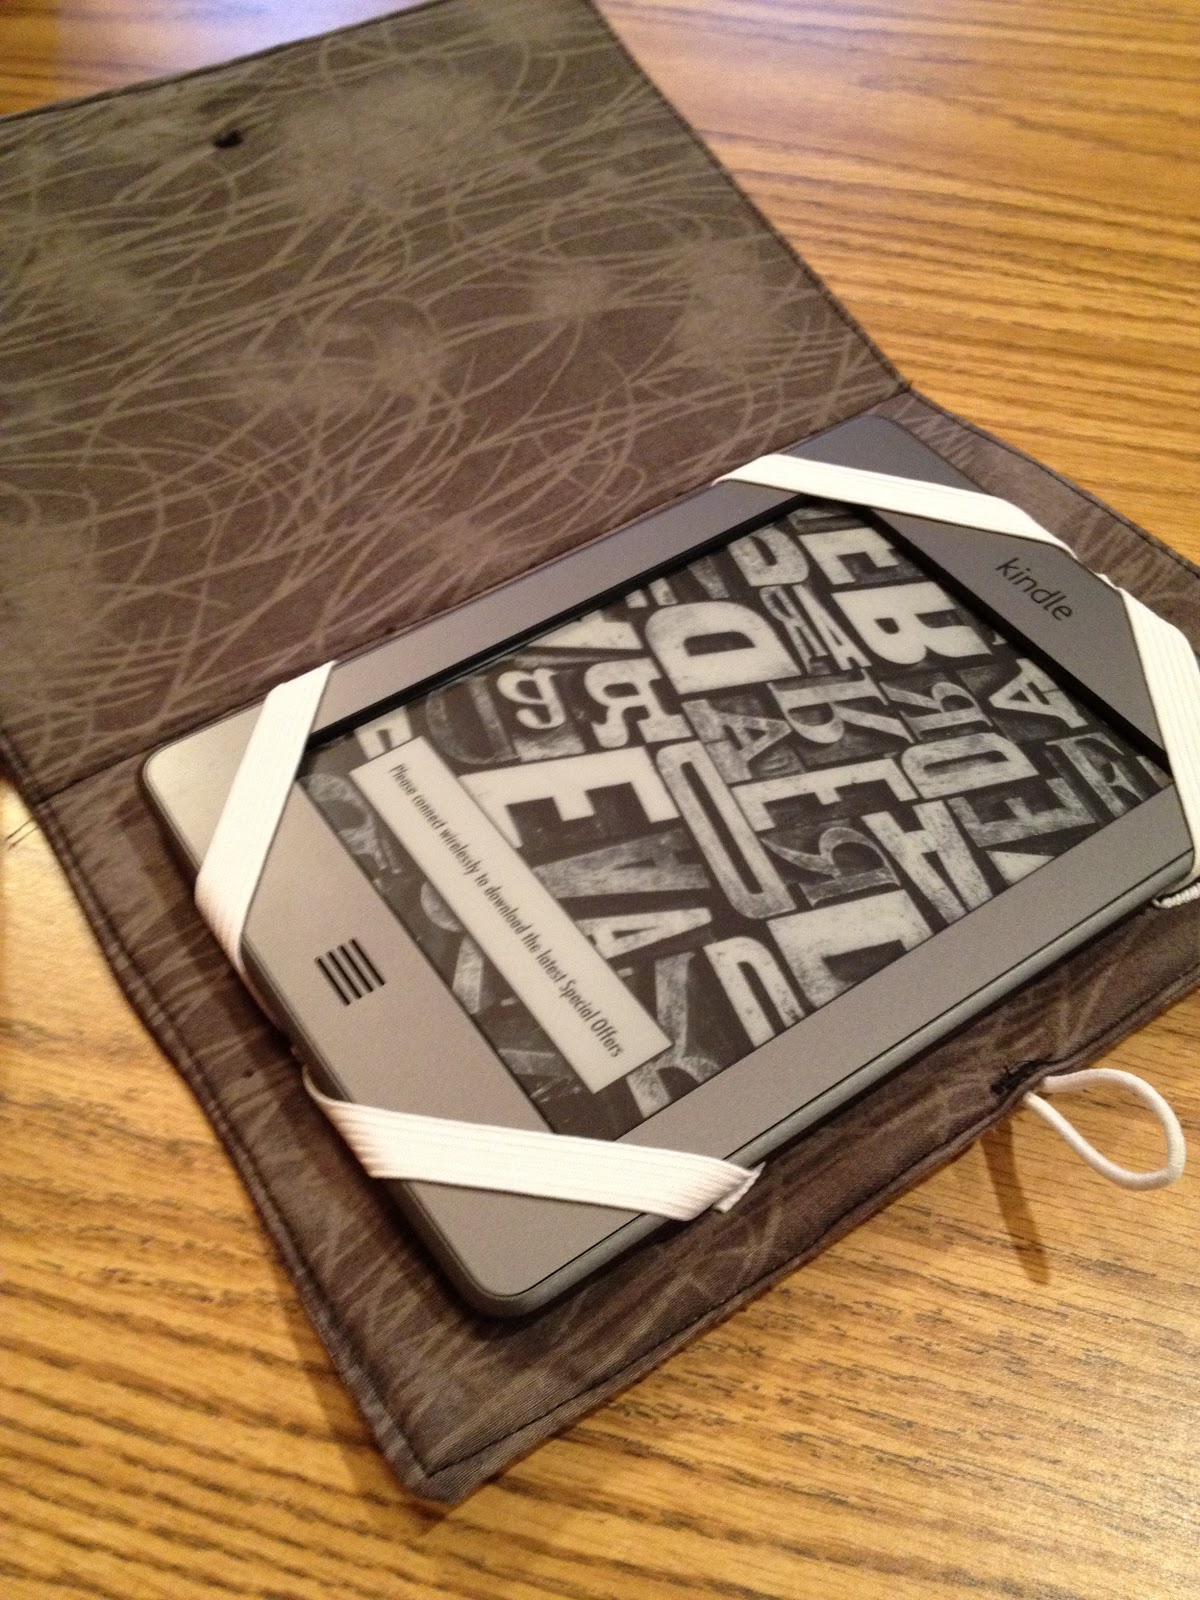
Kindle Case Tutorial

When you have a 1 year old running around your house, none of your possessions are safe. Charlie loves to play with anything that belongs to mommy or daddy, our phones, keys, wallets and computers. I probably spend about 50% of my day making sure he isn't getting into something he isn't supposed to.
A few days ago I caught Charlie playing with the kindle touch I bought my husband this last Christmas. He moved a chair close enough to our bed to climb on then got the kindle off of our dresser which is right next to our bed. After realizing how easily he could have just dropped the kindle on the floor and broken it, I decided it was time to buy it a case.
I looked at Wal-Mart and found nothing. They had cases for iPads and other electronics but nothing for the Kindle. I looked online and found a few cases that I liked but I didn't really want to spend a ton of money for just a case. So I looked through my plethora of crafting materials and came up with a plan.

I used...
1 Kids craft foam sheet
Elastic
Material
1 Button
1 Thin elastic hair band

1) Cut 8x11 inches of the foam

2) Cut 9x24 inches of the material
(If you are cutting your fabric on the fold cut 9x12)

3) Fold the material in half (good sides facing each other)
then put the foam in between it.

4) Sew the fabric around the foam and leave a 4-6 
inch hole so you can invert the fabric in a later step.
Make sure you don't sew over the foam!

5) Cut off the extra fabric except the fabric around the hole.
You want to leave the extra fabric there so that you tuck it in
and sew it down when the time comes. It should look like this.

6) Pull the foam out.

7) Turn your fabric right sides out. It should look like this.

8) Put your foam back in, fold under the extra fabric and pin down.

9) Sew a top stitch all the way around the case.

10) Find the center of you case and sew a straight line from
top to bottom. This will be where your case folds.
(Click the image to see it full sized with measurements)  
11) Add the Elastic. Measure 2 3/4 in. from the side, 

1 in. from the bottom and mark with a pencil. 
Then measure 3/4 in. from the side and 2 1/2 in. 
from the bottom corner and mark it. 
Do the same thing for both the top and the bottom .


12) Add the elastic hair band vertically centered of the
back side of the case and the button to the front side.

Here it is!


Thanks for reading!

Sunday, December 4, 2011

Wreath Tutorial #2

Here is another wreath tutorial. The women at my church made these at an activity last year and I was not able to attend, so I though this would be a good chance to give it a try.
I had to do most of this project while Charlie was asleep because he really wanted the hot glue gun. He has grown tall enough that he can reach things on the table now. He almost pulled the whole container of beans off the table, so I had to put everything away until he took a nap. I was lucky that he took one of his rare 3 1/2 hour naps, I was able to get a lot done.

The materials you will need are...
- 1 foam wreath
- pinto beans (any type of bean will work)
- hot glue gun
- glue sticks
- spray paint
- ribbon
- lots of time and patience


I started by gluing the beans around one row at a time .
I glued ....

and glued.
This is what it looks like close up.
It took me most of the day to finish adding all of
 the beans on the wreath.

Then my wonderful husband spay painted it for me.
I decided it wasn't as good idea for me to do the painting since I'm
pregnant.

Put 2 or 3 layers of paint on it and let it dry over night. Just remember when painting anything make sure that you do it in a well ventilated area. After you are sure that your paint is dry you can attach your ribbon and hang it on the door. 

Thursday, July 14, 2011

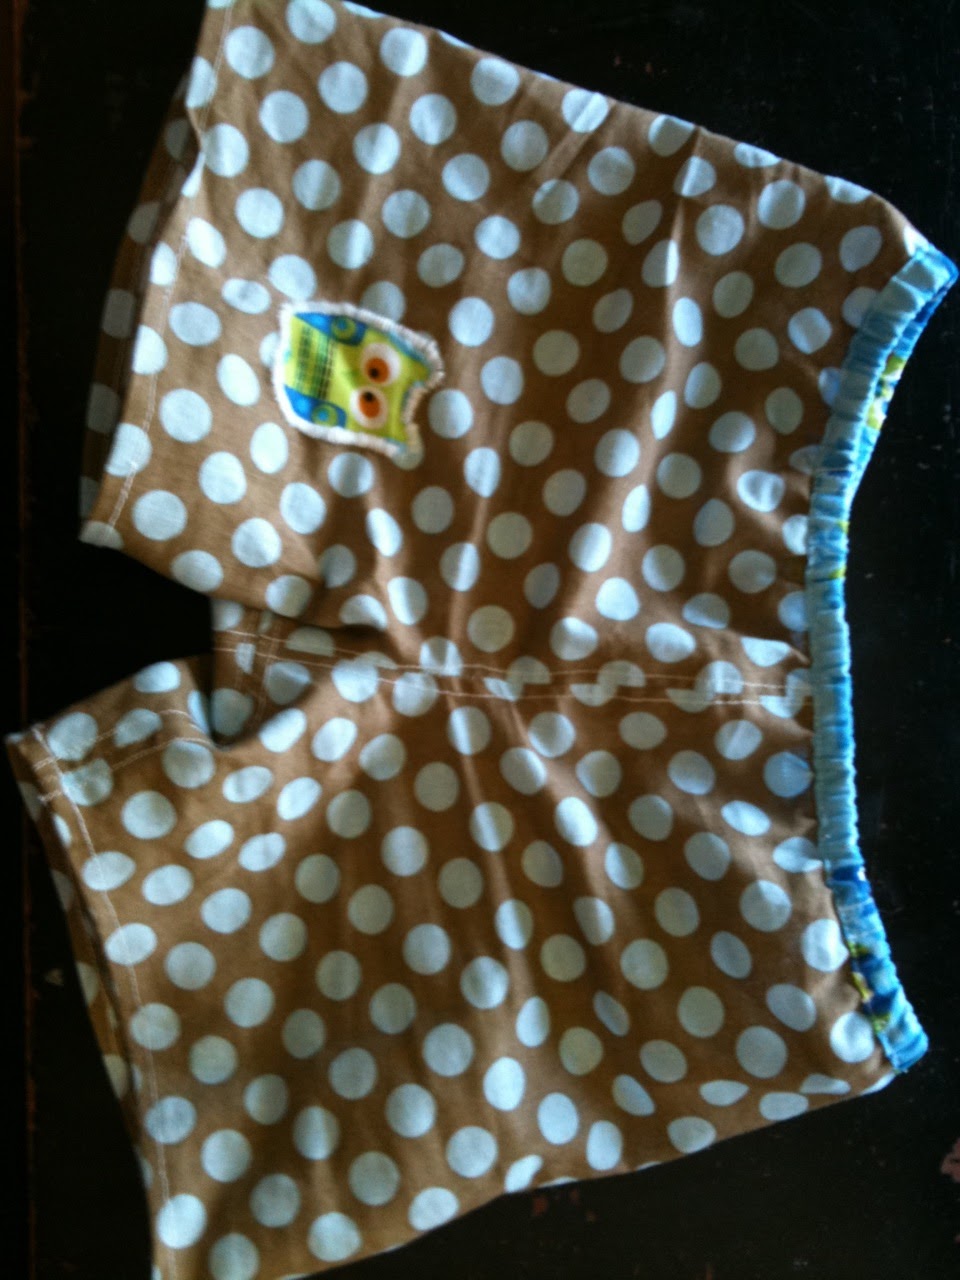
Handmade Baby Shorts

My ten month old baby boy has been growing like crazy and he is starting to run out of clothes that fit him. So I decided to make him some shorts so he can keep cool during those hot summer days to come. Instead of using a patter I took some of  his shorts and used them as an outline.


I just love the way these turned out and they should last for at least a few weeks before he grows out of them. If anyone wants a full tutorial on how to make these cute shorts, just leave me a comment and I will try and write one up soon.
Thanks for reading!