Tuesday, November 15, 2011

Crochet a Beanie


Since Christmas is not far away I have been looking for gifts to make for my loved ones and honestly I am freaking out a little. I guess I didn't realize how little time we really have until the holidays are here. So this week I have been doing a lot of crocheting (mostly because I am tired of sitting in front of my sewing machine) and I found this awesome beanie tutorial on YouTube by Crochet Geek. I am not very good at crocheting but I like to pick it up every now and then just to make sure that I still suck. 
This hat took me 2 hours

If you are still learning like me this is a good tutorial for you, so here it is. Crochet Geek also has some great tutorials on the basics of crocheting. 

The only problem I really had with this project was getting enough time to just sit and finish it. It only took me about 2 hours but if I had waited for my son to take a nap it might of moved along faster. I spent a lot of time chasing him around the house as he ran away with my yarn or crochet hook. 

And just for fun here is one of the other projects I'm working on. New pj's for Charlie! They are going to be footy pj's when they are all done. I still have to cut down the legs and the arms because the pattern I used was way too big, then I need to add the feet and the trim. I don't have much left to do and I hope to get it done sometime this week if I can find time. 


Thanks for reading.

Saturday, November 12, 2011

Wreath

I am so excited for the holidays, it is my favorite time of year! I love the cold weather, hot cocoa, Christmas lights and the cookies. Since we are so close to Christmas time I thought I would do an easy tutorial on wreath making. 

This is a very simple project and it didn't cost me more than 6 bucks. The materials you will need are
-1 wreath (I bought one from the dollar store)
-Yarn (You wont need more than half a skein of  yarn)
-Hot glue gun
-Decorations of your choice for the wreath.
-Wreath hanger (I also found this at the dollar store)
I bought this wreath at the dollar store but you can find foam wreaths at your local craft store for about 5 bucks and up.

Tie a knot around your wreath to
 keep your yarn secure.

Wrap the yarn around the wreath

Wrap some more...
and more...
When I had about 10 inches left to wrap,
I added in some silver berries. 

I cut the most of the stem off of the berries
 leaving  about 2 or 3 inches,
then  I stuffed the end into the wreath 


This is what it looks like close up.

Next I started wrapping around the berries
until the first cluster looked like this.
Then I pulled the remainder of the stem up
and wrapped the under it the .   

Hot glue the end of the yarn and berries
down to keep it from unraveling.
Add any other decorations you want
then hang it on your door. 
Thanks for reading!

Wednesday, November 2, 2011

Its been too long

The past few months have just been crazy, we found out a few months ago that we are pregnant with baby number two. I have had almost no energy so I have not done very many projects. During the past week I have started feeling so much better and I'm ready to work on some new stuff.

This Halloween I didn't really do anything fancy I dressed up as a witch, my husband was a wizard and I found a cute little elephant costume for Charlie at goodwill. The only thing I made was our wands (I will post a tutorial for that soon). Since this year was so uneventful I will show you our costumes from last year.


I am a big Star Trek fan! I remember sneaking out of bed every night to watch Next Generations on tv with my older brother and sister at 10:00 at night. Even though I new I would get into big trouble if (when) I got caught out of  bed by my mother, it was worth it.
 My husband and I spent weeks on his costume alone, I think that I burnt my self with the hot glue gun about a thousand times. I only spent a few days on the star fleet costumes, they were really easy compared to my husbands outfit.


This was the first onesie I ever made

My costume didn't turn out quite right

My husband and his brother all dressed up


Thanks for reading!


Thursday, July 14, 2011

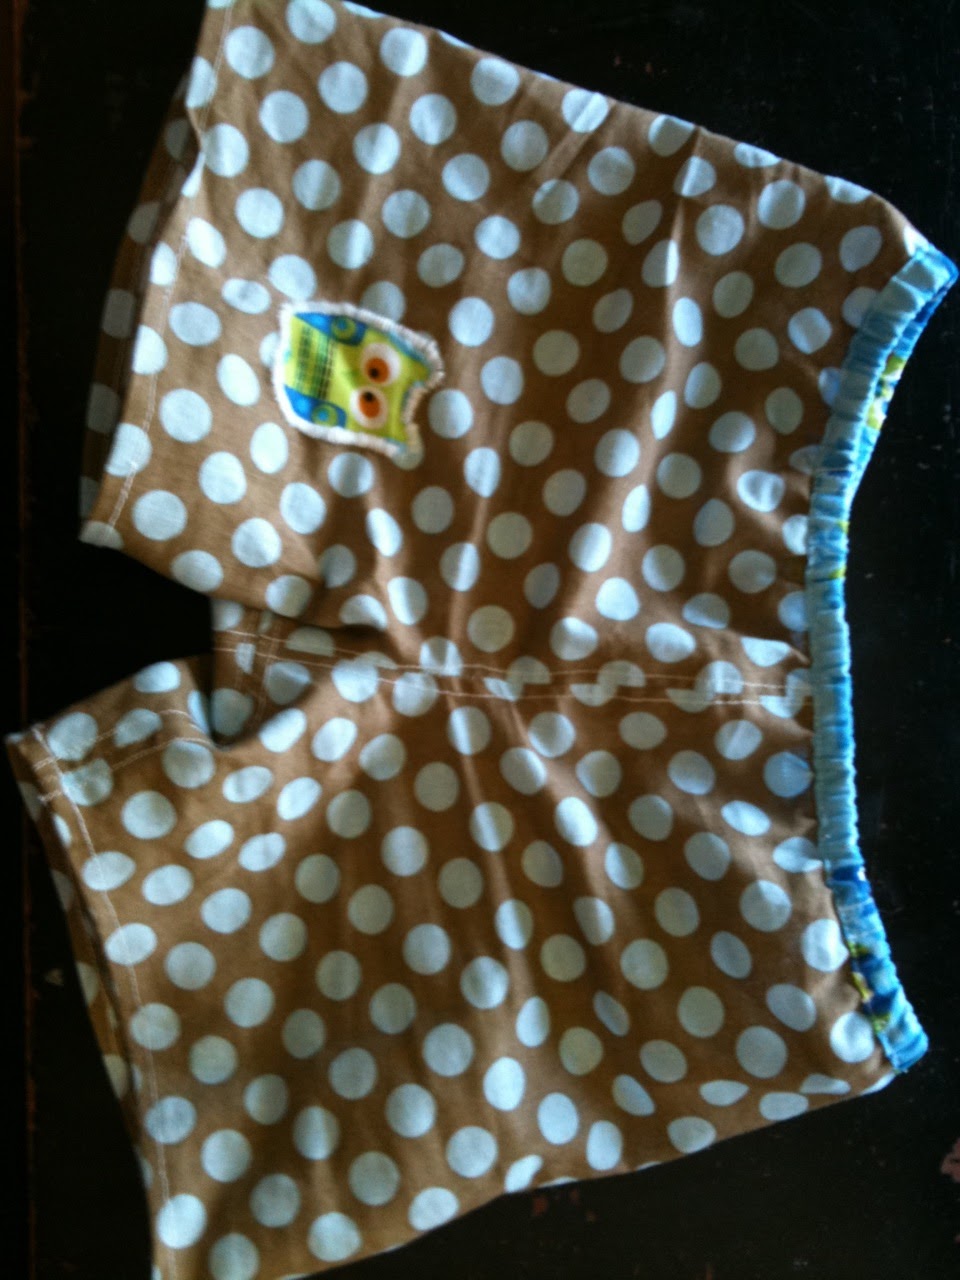
Handmade Baby Shorts

My ten month old baby boy has been growing like crazy and he is starting to run out of clothes that fit him. So I decided to make him some shorts so he can keep cool during those hot summer days to come. Instead of using a patter I took some of  his shorts and used them as an outline.


I just love the way these turned out and they should last for at least a few weeks before he grows out of them. If anyone wants a full tutorial on how to make these cute shorts, just leave me a comment and I will try and write one up soon.
Thanks for reading!

Friday, June 3, 2011

Baby Food Jar Spice Rack

Here is another post for all you moms out there who have a million baby food jars sitting around your house waiting to be used.
I got the idea to make my spice rack from this site. She put her jars on the refrigerator, but since my refrigerator is not next to the stove, I made a magnetic frame that I could hang anywhere in my kitchen.


Thanks for reading!

Thursday, May 26, 2011

More Baby Proofing!

My wonderful son Charlie has just turned 8 months old and he is now a crawling expert. Just recently he has learned to pull himself up into a standing position and get to things that were once out of his reach. So I have had to do a little more baby proofing this week to accommodate for his newly learned skill.

This is one of two shelves that we have had for almost 4 years and I don't know what I would do with out them. They were handmade by my husbands talented grandpa. (Thank you Grandpa Bodily!) Charlie has been very interested in the contents of the top shelves, so I had to cover them up to keep him out of them.


What I did first was move all of Charlie's toys down to the lower level of the book shelves and I put them into these toy boxes that I made a few months ago. I used diaper and wipe boxes to make these instead of paying a ton of money for storage containers.


I took a card board box, measured and cut out to fit the opening in the shelving then put material on it. Just like I did for my TV stand here. After it was all finished I decided it looked to plain, so I added a few fabric flowers.
Thank you for reading!

Wednesday, May 25, 2011

Baby Food Jar Chandelier Part 2

Earlier I started working on a chandelier from baby food jars. Here is my new and improved chandelier. This one took a lot of time to finish (mostly because I have an eight month old and he keeps me very busy.) A few nights ago my husband and I rented some movies and worked on the chandelier together after my son went to sleep. We did the majority of the work that night and I have been adding parts and pieces that we didn't finish, during Charlie's nap time.


Thursday, May 19, 2011

Baby Food Jar Chandelier

We have about a million baby food jars sitting in a box in my house. I saved them because I thought I might be able to use them for canning my own baby food. Then I found out that the jars cannot be resealed like mason jars, so I had to think of other things to do with them. I went looking online and I found this site with this really cool chandelier. I thought I might make a small chandelier to test out some materials so that I wouldn't spend a lot of money and time on something that might not turn out the right way. I am so glad I did, because this project did not turn out the way I wanted it to at all. At least I know what not to do for the next time I try to make a chandelier.

There are a couple of other sights with some good baby food jar chandeliers here and here

I will post about the new chandelier as soon as I finish it. Thanks for reading!

Saturday, May 14, 2011

My Attempt At Baby Proofing

My 7 month old has recently started crawling and he gets into EVERYTHING! He especially loves our cords and I have such a hard time keeping him away from them because our TV stand has no doors and is completely open.


So my sister in-law gave me this awesome idea.
                                 ⇩


I measured out some cardboard to fit the front of the TV stand and I hot glued fabric onto it, then I just had to slide them into place. It was really easy and it only took me 10 minutes to finish.


I still need to figure out something for the side of the TV stand, there are cords that are plugged into the wall and Charlie grabs onto anything that he can. I just put Wii Fit board up in front of them for now so that he can't get to them but if you guys have any better ideas to fix the problem please let me know.

Thursday, May 5, 2011

Fabric Flower Magnets


Last Christmas my mother in-law made me this really, really cute bag and I just loved the flowers that she made for it. so yesterday I decided I would try to make some like it
Bag my mother in-law made for me

 I found this great tutorial on making fabric flowers and I thought they would make great magnets for my kitchen. 
Before attaching the button to cover the magnet
 First I place the magnet in the middle of the flower. I put glue all the way around the button then I press it onto both the magnet and the flower, being careful not to get the glue to close to the holes in the button.
Hot glue to hold the button on
Two flower magnets for the fridge!